October 29, 2009

Kitchen Planning …

So this past week or so I've spent in front of my computer.  Not blogging, not surfing, not gaming, but designing ;) ... designing a kitchen :) ... the Matawatchan kitchen :D !!  I’m using the Home Designer software package that I posted about here.  I am finding it fairly easy to use and it’s library of fixtures, appliances, material, paint, furniture etc… is quite extensive. 

It has been going great but ….wow, there is so much to consider when you sit down to design a kitchen. 

  • where will the appliances go
  • where do they best fit
  • how will the traffic flow
  • what does the work triangle look like
  • is there enough storage
  • where does the sink go
  • how much space do you need between cabinets
  • how big should an island be
  • how does it all work in a small open concept main floor of a 125 year old log home

And I haven’t even looked at the finishes yet !

But...I am nothing if not driven by a challenge so I'm dusting off the text-books and surfing the net and blogosphere ... kitchen design here I come.

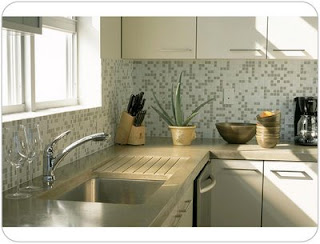
Here are some inspiration photos I’ve been collecting care of Houzz.  Hope you enjoy!  As for me – it’s back to my kitchen planning!!!

October 24, 2009

The “Matawatchan” Project …

Mat-a-who-chan you say - that's Mat-a-watch-an - a tiny village south-west of Ottawa, Ontario.

Recently the hubster and I packed up our work clothes and headed to Matawatchan. The purpose was to visit our good friends who are re-building a 125 year old log home. These friends have provided me with my very first project as a decorator - and a doozie it is - but hey I'm up for a challenge!!!

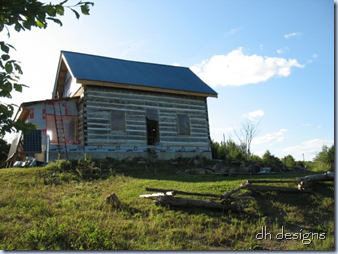
Log Home with Roof

This labour of love has been underway for several years now, beginning with the purchase of the property, followed by a couple of years to dismantle, number, clean and restore the logs. A foundation in the new location was poured a couple of years ago, last year the beautiful old home was resurrected in it's new location and this year it was topped off with a shiny new roof. Next will be windows, doors, exterior and interior chinking (the substance between the logs that keeps the elements where they belong - outside) and then the interior - that's where I come in.

Main Floor from sunroom   

This is the main level taken from the new sunroom. (Aren’t those photo stitch settings on your camera amazing!!)

 Top Floor from corner  

The second level – the master suite.

A lot of work you say -- you bet your patootie it's a lot of work. I am humbled by the dedication these folks have for their project. However, once you set foot on the property (actually even before you get there) the sense of peace and calm you feel makes it easy to understand the pull. And can you imagine the phenomenal sense of accomplishment these folks will feel at the end of their project. Just spending two days there was enough to get my mind reeling with possibilities for our future projects.

IMG_2583

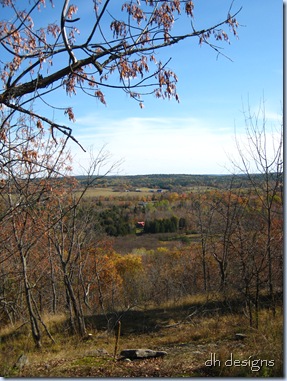
So I arrived armed with my camera, graph paper and tape measure, magazines and ideas. Hubster brought his brawn (and his guitar too for a song or two) and we had a fantastic weekend. Measurements were interrupted by some great outdoor time - ATV trips up the mountain to see the amazing view, wielding of the chainsaw to fell tree stands, using some of those logs to begin an exterior hardscaping project that will eventually be steps leading down to a cool shady spot to hide when the summers heat up, some excellent meals and a bottle or two of red :).  

And being the city-slickers we are (although you would hear otherwise from hubster – grunt grunt), we were quite thankful for the hot tub when we got home!

 IMG_2586IMG_2585


I thank these dear friends for the opportunity to work on such an amazing project and for their generosity in allowing me to blog about it.

You will definitely be hearing more about the "Matawatchan Project" in the future ....

October 11, 2009

Just in time for …. Thanksgiving!!

Remember my dining room table?  The one I sanded in this post (This really is Labour Day Part I) and then primed in this post (This really is Labour Day Part II) – well it has taken just over a month, but it is finally ready – just in time for … Thanksgiving!!!

There have been many steps involved in this project, some of which you’ve already read in my two previous posts, but the majority of which I haven’t shared.  After priming in early September, the table parts sat in our garage – I could tell you I was making sure the primer was well cured before continuing – hubby will tell you that there was some procrastination involved – but the truth is it was a combination of life getting in the way (a couple of weekends away) and some trepidation on choosing a colour.  Would I pick the wrong colour, would it look silly, would I be sorry I painted solid wood???  Many uncertainties, but I finally did make a choice, because – darn it – I blogged about this and I had to finish!

I tried Home Depot first on a recommendation from Susan of Susan on Design and Kelly of DesignTies to check out Ralph Lauren’s Turret Stair for a colour choice.  After perusing the colour chips for a good 15 minutes, I finally asked and it turns out it is going to be discontinued, therefore it’s no longer on the floor.  :((

Next stop was Benjamin Moore where I had already sourced a few choices.  As soon as I mentioned my project and that I wanted a rich dark brown I was directed to Black Bean Soup – which I had already as one of my colour choices. 

So Black Bean Soup it was!
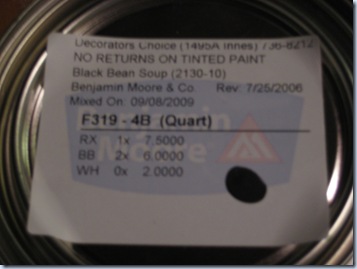
IMG_2440

Now, let me just say that I was really disappointed in the virtual colour chips I used in my previous post on colour choices.  The first colour was supposed to be jet black – and it looked nothing like jet black.  So – lesson learned – you will just have to take my word for it when colour is concerned – unless I find another website that provides a truer colour representation.

Back to the table …  First a collection of supplies – which grew exponentially throughout the process :)
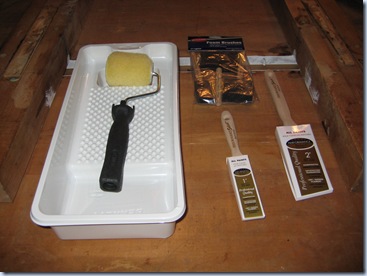
IMG_2442

The first coat was applied:

 IMG_2454

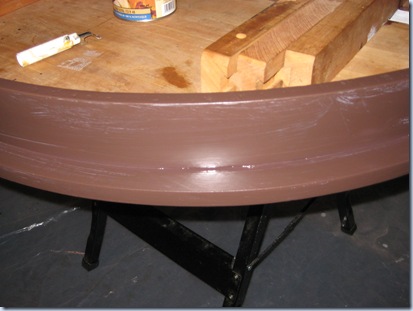
At this point I’m seriously questioning my colour choice – this is nowhere near the rich brown-black I was looking for – it’s looking more like chocolate brown. Another will definitely be required!  Let’s hope the second coat will darken this up – which it does, and the varnish darkens it even more.  The table top ended up with probably 4 coats of paint and 4 coats of varnish  (combination of brush on and spray) – the rest of the table got 3 coats of paint and 2 of varnish.

IMG_2541

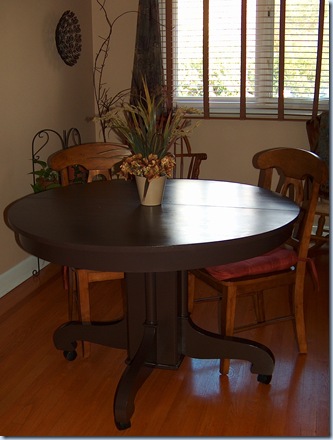
It has taken quite a bit of effort, but finally I have my refinished dining room table in the house ready for a crowd tomorrow to celebrate our Canadian Thanksgiving (bird is in the oven as we speak!).
various 031

Here it is (above) in place in the dining room with two of the four new chairs I bought.  Now these were a steal!  I found them at Canadian Tire (I’m trying to think of an equivalent American Store, but not sure I can – a cross between Walmart and an auto supply store) – yep – Canadian Tire!  They were originally $69.99 – and I was OK paying that – but they went on sale last week for $39.99!!!  Four dining room chairs for less than $160.00 – and they are comfortable! 
various 025           various 033

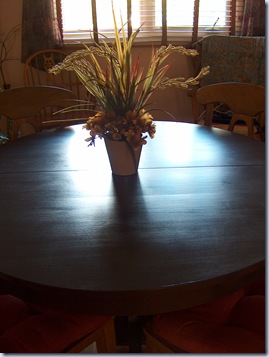
Flower arrangement I picked up at HomeSense yesterday for $14.99 – love the light reflecting off the table above.

    IMG_2577

Picked up the Give Thanks at Loblaws for $9.99.  Hubby is suggesting that we paint part of the chairs the same brown as the table.  Not sure if I’m ready for another round with the paint brush, but he may be right. 

What do you think???

         various 045

Now we are ready to give thanks!!!

Happy Thanksgiving to all of my Canadian blogger friends!

And on to the next project – painting the dining room …

~~~~~~~~

I’m participating in Metamorphosis Monday this week, so please head over and join with Susan at Between Naps on the Porch to check out other before & afters!

Pic_for_Body_of_Blog3

October 7, 2009

Where do YOU get inspiration?

For years I’ve subscribed to home decor magazines.
For years I’ve perused home decor magazines.
For years, I’ve ripped, I’ve folded corners, I’ve hoarded and I’ve justified home decor magazines.
So imagine my surprise when the inspiration for my newly vacated 2nd bedroom (daughter #1 recently flew the nest) came from a box of tissues – yep – a box of tissues
IMG_2548
I just love the colours and the pattern on the box and I’ve had it as an inspiration idea for quite a while.  Then I found a kitchen towel with another great pattern and similar colours for more inspiration. 
IMG_2550
And look how well these go with the set of sheets I found a few years ago that just happens to feature my favourite pattern – Paisley!!
IMG_2553
Just goes to show you that inspiration can come from any source – but let’s just keep that between us OK – don’t tell my hubby :)
So tell me – where do YOU get inspiration?
Related Posts with Thumbnails